
Categories

Kitchen Undermount Sinks Installation
How to Install Undermount Kitchen Sinks, it is an extremely important part of creating a high quality countertop. You have to install an undermount kitchen sink before the countertops are set down. Once the countertop are set down, you usually will not be able to fit the sink through the hole, and you won't be able to properly seal between the sink and the underside of the countertop.
The following are four steps to install the undermount sinks.
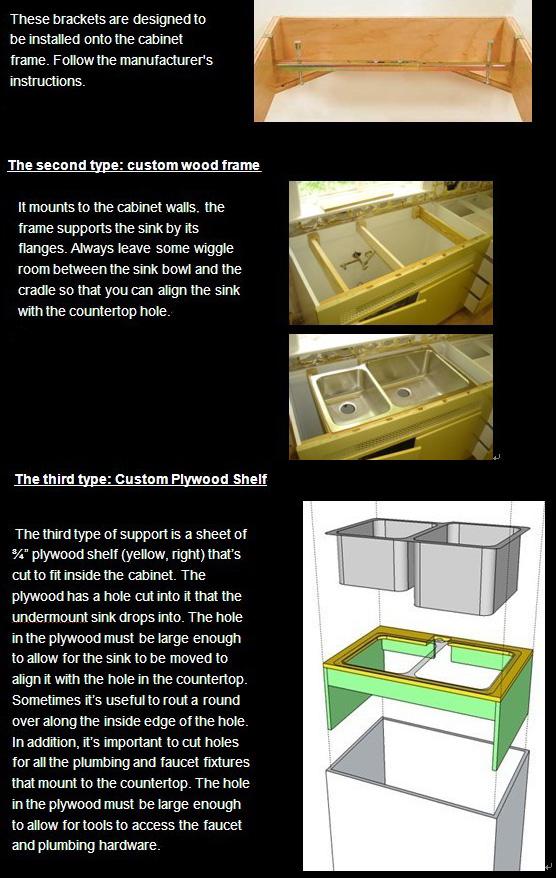
1. First install the sink supports. There are several ways to create sink supports. Here we will introduce 3 different ways for you. You can accord the situation to choose the best way that you like. (Please see the following “The Ways of sink supports”)
2. Then set the sink onto the support frame.
3. Apply a generous bead of silicone or siliconized acrylic kitchen and bath caulk around the top of the sink’s flange.
4. Install the adjacent countertop slabs over the sink, sandwiching it between the countertop and the cabinet frame.
The types of Sink Supports
The concrete countertops should not bear the weight of the sink. Instead, you can build a support out of plywood, and the cabinet frame together with the support bear the weight of the sink.
Caulking is important to create a watertight seal
It is very important to create a watertight seal between the underside of the countertop and the sink. Take care when applying the silicone caulk along the flange of the sink that it is generous enough to create a watertight seal, but not so much that it is messy.
Bare concrete will react with silicone to produce a nasty-looking, oatmeal-like consistency that will ooze out of the sink joint. Therefore, you must seal the underside of your sink openings so that only sealed concrete touches the silicone.